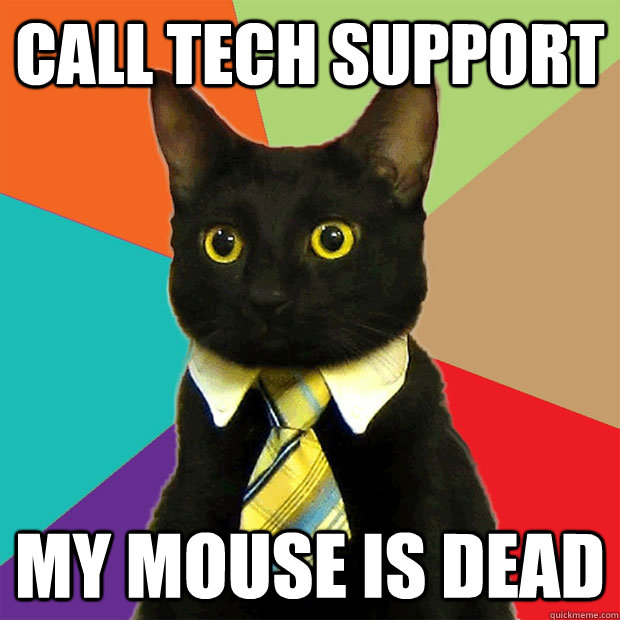

Facebook email hack

My wife turned to me and told me she’d gotten a weird message from my aunt that she didn’t know what to do with. It read;
“Hi….I actually got another friend request from you which I ignored so you may want to check your account. Hold your finger on the message until the forward button appears…then hit forward and all the people you want to forward too….I had to do the people individually. PLEASE DO NOT ACCEPT A NEW friendship FROM ME AT THIS TIME.”
You wern’t hacked. It never happened. Your friend didn’t send this and the message is bogus. Don’t do what it says. Don’t forward it, don’t copy and paste, just delete. And while you’re at it, don’t accept new request from people on your friends list already.
If you’re still worried though, change that FB password. Frequent changes and complex passwords are your best defense against this kind of thing!


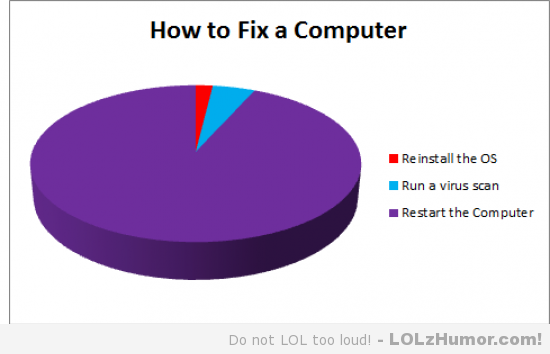
Fix Black Screen at boot, continual restarts, or stuck at windows logo

Problem:
Fix Black Screen at boot, continual restarts, or stuck at windows logo
Solution:
This has worked for me in a number of cases where Windows will not boot. If the file system becomes corrupt from something like a virus issue this write a new boot sector to the system partition or repair the MBR.
First you will need to boot into windows Windows recovery console
If there is an administrator password you will need this, if not it can be cleared with an offline password recovery disk. (UBCD, or there are standalone ones as well)
Once the console is loaded you have to choose the installation you wish to repair.
At the prompt type “fixboot” to rewrite a new boot sector to the drive.
After this completes type “fixmbr” to repair the MBR this may be redundant but it doesnt hurt.
Finally you can also re-add the the installations of Windows to the boot.ini file by running the command “bootcfg /rebuild” this automatically scans the drive for installs and adds them to the file.
You can then reboot and see if this fixed your issue.
If you are still having problems or if recovery console does not see the installation run “chkdsk /r”, it never hurts.
server reboot – Restart mobile mail and OWA
Problem:
Whenever the server reboots a process starts before the default website can start casuing mobile mail and OWA to not function.
Solution:
To restart default website in IIS right click task manager, click show processes from all users, end EdgeTransport.exe process, open “Internet Information Services (IIS)”, tree down experit-2k11sbs > sites > default website, on the right hand side where it says manage website click start, if restart and stop become highlighted, you have started the website which controls OWA and mobile mail.
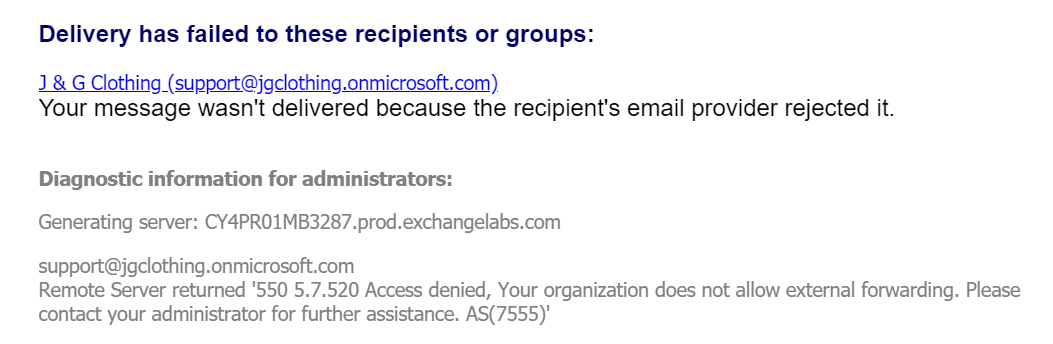
Mail error “Your organization does not allow external forwarding”
Some Microsoft 365 accounts default to block automatic email forwarding as part of their outbound spam protection. If external forwarding is disabled for your Microsoft 365 account, you will see a specific bounce message in your inbox at Microsoft 365 after attempting to set up forwarding to Help Scout. The text of the bounce will include this line:
550 5.7.520 Access denied, Your organization does not allow external forwarding. Please contact your administrator for further assistance. AS(7555)
You may choose to enable automatic forwarding for all mailboxes in your Microsoft 365 account, or enable it only for the mailboxes you’re forwarding to Help Scout. Choose the option that is best according to your organization’s security policies.
Note: The menus and options you see in your Microsoft 365 account may vary depending on several factors, including the level of service you have with Microsoft or if you purchased Microsoft 365 through a reseller. Reach out to your reseller or Microsoft support if you are unable to follow the directions here.
Enable Automatic External Forwarding for All Mailboxes
- 1
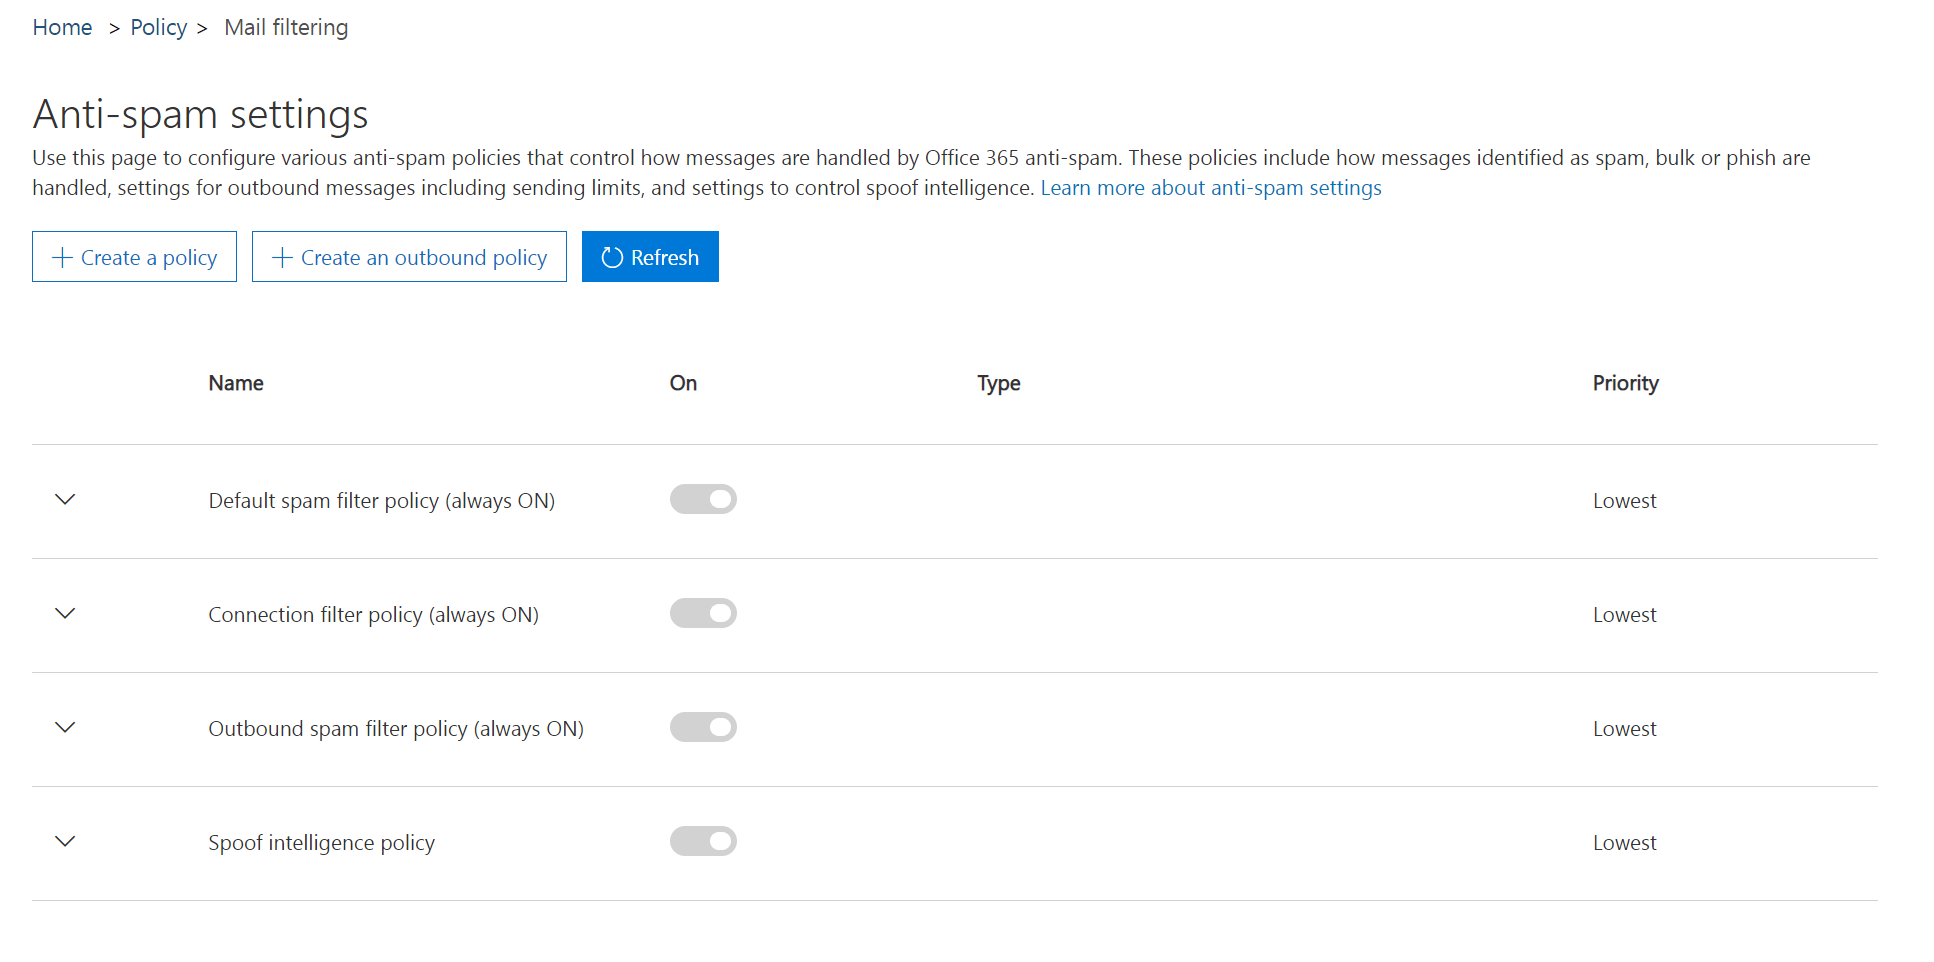
- Log in to your Office 365 Security & Compliance portal for Microsoft 365 and choose Threat management > Anti-spam or head directly to the Anti-spam settings page here: https://protection.office.com/antispam
- 2
- Click the down arrow next to Outbound spam filter policy (always ON) and click the Edit policy button.

- 3
- Click the down arrow next to Automatic forwarding, then choose On – Forwarding is enabled from the dropdown. Click Save.